Ever dreamed of transforming your locks with sun-kissed streaks without the salon price tag? DIY hair highlighting at home is not only possible but can yield stunning results when done right. This comprehensive guide will walk you through the process, from choosing the right products to mastering professional techniques. Whether you’re a highlighting novice or looking to refresh your skills, get ready to elevate your hair game and embrace a vibrant, personalized look that reflects your unique style.
جدول المحتويات
1. Understanding hair highlighting: techniques and types
2. Essential tools and products for at-home highlighting
3. Step-by-step guide to highlighting your hair at home
4. Aftercare: maintaining your newly highlighted hair
5. Common mistakes to avoid when highlighting at home
6. اختتام
Understanding hair highlighting: techniques and types
Hair highlighting is an art that can dramatically transform your look, adding dimension and depth to your natural color. Before diving into the DIY process, it’s crucial to understand the different techniques and types of highlights available. The most traditional method is foil highlighting, which involves wrapping sections of hair in foil to isolate them during the lightening process. This technique allows for precise application and can create bold, dramatic results. Foil highlights are ideal for achieving a multi-tonal effect or targeting specific areas of your hair.
Balayage, a French word meaning “to sweep,” is a freehand painting technique that creates a more natural, sun-kissed look. This method doesn’t use foils, instead relying on the stylist’s expertise to apply the lightener in a sweeping motion. Balayage highlights are typically more subtle and low-maintenance than foil highlights. Another popular technique is frosting, which involves adding very fine, subtle highlights throughout the hair. This method is perfect for those wanting a subtle change or to brighten their overall hair color without a drastic transformation.
When it comes to types of highlights, you have several options to choose from. Partial highlights focus on the top layer and sides of your hair, framing your face and adding dimension. Full highlights involve lightening throughout your entire head of hair for a more dramatic, all-over effect. For those seeking a bold, statement-making look, chunky highlights involve lightening thicker sections of hair. On the other end of the spectrum, babylights are ultra-fine highlights that mimic the natural, subtle lightening effects of spending time in the sun.

Essential tools and products for at-home highlighting
Achieving professional-looking highlights at home requires the right set of tools and products. Your DIY highlighting kit should include both essential equipment and high-quality hair care products to ensure the best results and minimize damage to your hair.
First and foremost, you’ll need a lightening agent. Professional-grade hair lightener or bleach is crucial for lifting your natural hair color. Avoid box dyes, as they can be unpredictable and potentially damaging. Pair your lightener with the appropriate developer, typically available in 10, 20, 30, or 40 volume strengths. The volume you choose depends on your natural hair color and desired level of lift. For most at-home applications, a 20 or 30 volume developer is suitable. If you’re concerned about potential damage, consider using a bond-building additive like Olaplex, which can help protect your hair during the lightening process.
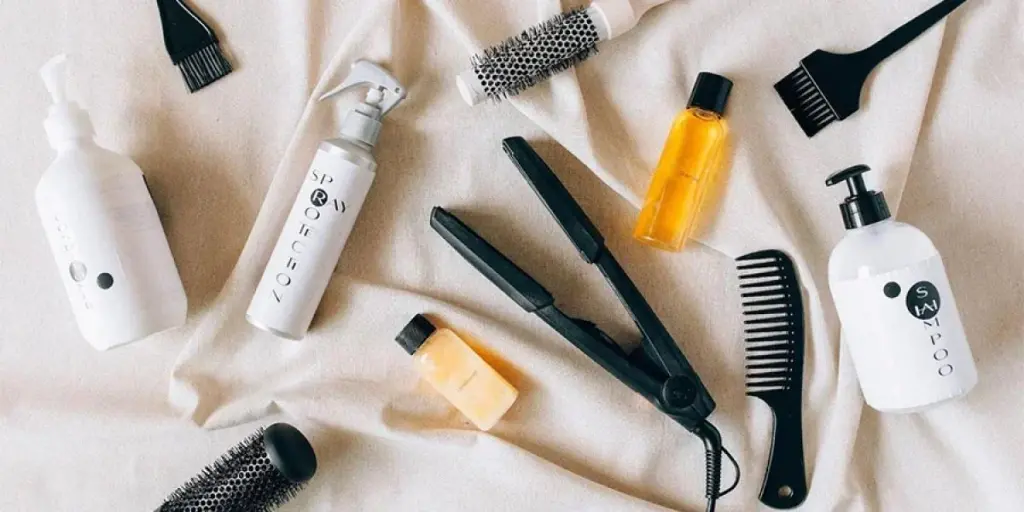
In terms of tools, invest in a good quality tinting brush for precise application, and a non-metallic mixing bowl to prepare your lightening mixture. Highlighting foils are essential if you’re opting for the foil method, while a rattail comb will help you section your hair accurately. Don’t forget to protect your hands with disposable gloves and your clothes with an old towel or cape. For aftercare, stock up on purple shampoo to maintain your highlights and counteract brassiness, along with a deep conditioning treatment to keep your newly lightened hair healthy and hydrated. Having these tools and products on hand will set you up for success in your at-home highlighting endeavor.

Step-by-step guide to highlighting your hair at home
Preparation is crucial for successful at-home highlighting. Begin with clean, dry hair that hasn’t been washed for 1-2 days, as natural oils help protect your scalp. Cover your workspace with old towels and wear clothes you don’t mind staining. Gather all necessary tools: a non-metallic mixing bowl, applicator brush, rat-tail comb, hair clips, protective gloves, and a hand-held mirror. Section your hair by creating a center part from forehead to nape, then a perpendicular part from ear to ear, dividing your hair into four quadrants. Secure each section with clips.
Mixing the lightener correctly is vital. Follow the product instructions carefully, typically using a 1:1 ratio of lightener to developer. If you’re new to highlighting, consider using a lower volume developer (20 volume) for a more gradual lightening effect. The mixture should have a smooth, creamy consistency – neither too runny nor too thick. Perform a strand test on a small section of hair to determine the optimal processing time and check for any adverse reactions.
For traditional foil highlights, start at the back of your head and work forward. Take thin sections of hair (about 1/4 inch wide) and place a foil underneath, close to the scalp. Use the rat-tail comb to weave out smaller strands for a more natural effect. Apply the lightener mixture from roots to ends, ensuring even coverage without oversaturating. Fold the foil to enclose the treated hair. Continue this process, alternating between highlighted and non-highlighted sections. For face-framing highlights, use smaller sections (1/8 inch) and place them strategically around your face.
If opting for a balayage technique, the application process differs. Work in larger sections, starting about 2 inches away from your roots. Using a brush or your gloved hands, paint the lightener onto the hair in a downward sweeping motion. Concentrate the product on the mid-lengths and ends, feathering it upwards for a natural transition. To prevent the lightener from transferring to other strands, wrap each painted section in plastic wrap or special balayage films.
Monitor the processing time closely, checking every 5-10 minutes by gently opening a foil or unwrapping a balayaged section to assess color development. The total processing time can vary greatly depending on your natural hair color and desired level of lift, typically ranging from 15 to 45 minutes. If you’re aiming for a subtle change, err on the side of caution and remove the lightener earlier. Once you’ve achieved the desired lightness, rinse thoroughly with cool water until it runs clear. Avoid hot water, as it can open the cuticle and lead to increased damage and color fade. Remember, if at any point you feel unsure or encounter unexpected results, it’s best to stop and consult a professional stylist.

Aftercare: maintaining your newly highlighted hair
After successfully highlighting your hair at home, proper aftercare is crucial to maintain the vibrancy of your new color and keep your hair healthy. The lightening process can leave your hair more porous and prone to damage, so it’s essential to adjust your hair care routine accordingly.
First and foremost, invest in a color-safe, sulfate-free shampoo and conditioner. These products are gentler on your hair and help prevent your highlights from fading too quickly. Incorporate a purple shampoo into your routine once a week to combat brassiness and keep your highlights looking fresh. When washing your hair, use lukewarm water instead of hot, as high temperatures can strip color and moisture from your strands.
Deep conditioning treatments should become a regular part of your hair care regimen. Use a hydrating mask once a week to replenish moisture and keep your hair soft and manageable. For added protection, apply a leave-in conditioner or heat protectant before styling, especially if you use hot tools. Limit heat styling when possible, and when you do use heat, keep it on a lower setting to prevent further damage to your highlighted hair.

Common mistakes to avoid when highlighting at home
While DIY highlighting can be a great way to refresh your look, there are several pitfalls to be aware of. By avoiding these common mistakes, you’ll increase your chances of achieving professional-looking results.
One of the most frequent errors is over-processing the hair. It’s tempting to leave the lightener on longer to achieve a brighter blonde, but this can lead to severe damage and breakage. Always follow the recommended processing time and check your hair frequently. Another mistake is applying the lightener too close to the scalp, which can cause irritation and uneven color. Start applying about a half-inch away from the roots to avoid this issue.
Inconsistent application is another common problem. This can result in patchy or streaky highlights. Take your time and ensure even application of the lightener for a more natural look. Additionally, many people make the mistake of highlighting too much hair at once. For a subtle, sun-kissed effect, less is often more. Start with fewer highlights than you think you need – you can always add more later.
Lastly, neglecting to perform a patch test is a critical error. Always test the lightener on a small section of hair 48 hours before your full application to check for any adverse reactions. Remember, patience and preparation are key to successful at-home highlighting. If you’re unsure about any part of the process, it’s always better to consult a professional stylist.

وفي الختام
Highlighting your hair at home can be a rewarding and cost-effective way to refresh your look. By understanding the different techniques, using the right tools and products, following a careful step-by-step process, and maintaining proper aftercare, you can achieve salon-worthy results. Remember to start small, be patient, and always prioritize the health of your hair. While DIY highlighting offers creative freedom and convenience, it’s important to recognize your limits and seek professional help if you’re uncertain or aiming for a dramatic change. With the knowledge and tips provided in this guide, you’re now equipped to embark on your at-home highlighting journey. Embrace your new, sun-kissed locks and enjoy the confidence that comes with a fresh, personalized look.


